 |
Army Training
Idle villagers are trained in barracks in the presence of sufficient amount of resource, required for the training of the respective unit.
The Barracks have an initial capacity of 50 soldiers.
Activation of Premium membership increases the capacity of the barracks with 20%.
Units of one type recruited at the same time will get trained simultaneously.
If you run out of barracks vacancies, but you still have free groups, allowed for training by the Military Doctrine level, you will be able to recruit the training groups in a queue. Queued groups will get trained one after another. If you dispose of enough resources and population you can recruit all your remaining free training groups at once, but don’t forget they will still be queued.
Unit upgrade – turning a lower class units into higher class units of the same type if you have the required research levels. You can upgrade light and/or heavy units to elite units of the same type in the fourth tab of each barracks building. You don’t need population for that. The upgrade cost is the difference between the total price of the higher class units and the total price of the lower class units. The training time is the one of the higher class units. Siege engines cannot be upgraded.
After the army units are trained they remain immobilized for 3 hours. During that period you can mobilize them whenever you want. After the 3-hour period has expired, they are automatically mobilized.
Immobilized soldiers will not fight, nor can be destroyed. They also are not seen by the enemy’s spies.
Global Morale
Army’s fighting spirit. Global Morale depends on the overall behavior of the player.
Morale’s basic value in attack and defense is 100 in annexed provinces and colonies and 110 in the capital. But if a player attacks another player out of the allowed net worth points range x2, Morale drops, because the player is not fighting equals. For every difference of 0,1 (either above or below range x2) Morale drops progressively by 1,67 points.
Upon returning home, the army restores its basic Morale value.
The basic Morale value can be raised by researching Army Drills, which gives 1 Morale point per level. If a player is in an Alliance, at the position of Commanding Officer, he receives a basic bonus of +10 Morale points, but the actual extent of this bonus depends on the Loyalty Status of the player in the Alliance.
Both armies start to fight against each other with basic Morale of 100 vs. 100.
Each round the Morale drops due to the fatigue (by 5 +/-3 points (4 +/-3 in realms without Infirmary module)), damage (by 1 to 3 points). When your army inflicts more damage than the opponent your morale raises and the enemy’s drops, according to the following formula:
- 20-50% difference in the lost army gold equivalent = 1 morale correction
- 51-150% difference = 2 morale correction
- Everything above 150% difference - 3 morale correction
The Morale drop differences can reach 2-8 points each round (1-7 points in realms without Infirmary module), which prevents the loss of a battle on a casual basis.
After passing the 50 points of the morale, there is a chance progressively increasing by 2% with every Morale point below 50 for your army to flee.
The Military Technology Military discipline decreases the threshold at which appears a chance for your army to flee. The new threshold starts at 40 morale and chance to flee increases progressively by 2,5% for every morale point below 40.
Fortress garrison do not have morale - they simply cannot escape anywhere.
If the army flees from the battlefield, it automatically loses 20% of its remaining troops. The rest of the army returns to the province they were sent to mission from.
If the army flees from the Fortress siege stage of the battle, it automatically loses 10% of its remaining troops.
If an army attacks ’inner province’ (а province surrounded by all the provinces it shares a border with), loses 20 morale points. Province can not be double-boxed.
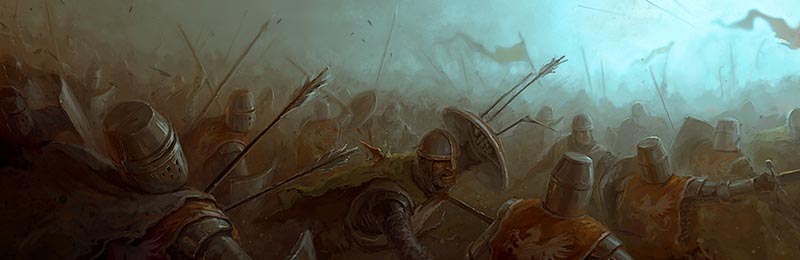
Battle Structure
The battle commences. To attack another player, you need, at very least, 100 soldiers.
Retreat
It’s valid for all type of attacks but just in military posts.
Battle Terrain
The different types of terrains give different bonuses to the army during a battle. Please, take a look at section Global Map >> Terrain types.
NB! Apart from terrains bonuses in attack or in defense (if there are any), you can enhance your army’s strength in attack and/or in defense, activating Premium.
Fortress siege
It is conducted after a successful, for the attacker, Field battle. If there isn’t any defense field army deployed in front of the Fortress wall, the Fortress Siege battle is directly conducted, where the attacking soldiers are aiming to smash enemy’s Fortress walls.
A successful Fortress Siege loots the exact amount of resources the carrying capacity of the sent units and supply wagons allows. An equal percent of every type of resource of the attacked province (for example, the capital) is loaded, which means that if the whole defender’s capital consists of: 100 wood, 100 iron, 100 stone and 100 gold, and the attacker’s carrying capacity is 200, he will take 50 of each resource.
If the capital is attacked and its gold balance is negative, the attacker doesn’t take it, i.e. his army doesn’t turn back home with this kind of negative.
There isn’t any looting if the Fortress walls haven’t been already destroyed.
With every successful Fortress Siege 2 Honor points are earned if, of course, the requirements for getting Honor are fulfilled.
Field Battle
This attack sends the troops to fight only with the opponent’s field army, without sieging the Fortress or pillaging the civil population.
Field battle army neither loots resources nor kills villagers. The only profit for the attacker is military points for having slashed enemy units and honor in case he has lost at least 10% of his own troops.
With every successful Field battle 1 Honor point is earned if, of course, the requirements for getting Honor are fulfilled.
Defensive field troops have 20% hit points bonus if deployed in the capital.
Pillage
It inflicts damage on the defender’s civil population.
The working population of the pillaged province is not all dismissed from the mines at the time of the impact. The pillaged population is divided into 3 equal percentages and each of them is subtracted from: the Lumber Mill, Stone Quarry and Iron mine, while the intact civil population continues producing resource.
The attacker receives 50% of the pillaged population. Captured population will be unloaded in the holding from which the attack was sent. In case that is a military post, the captured population would be lost.
It’s punished with Honor drop, as it’s considered a crime against humanity. Each successful pillage decreases the aggressor’s Honor by 4 points.
Pillaging kills up to 20% of province’s population. After that the province cannot be pillaged for the next 17 hours.
Each player is allowed to send up to 4 pillages every 24 hours. Recalled pillages count too.
In order to be successful, the attacking troops’ total pillaging strength should be equal to at least 10% of the threatened province population. Learn more about the individual pillage coefficient of all units, going to menu Military Units.
In order to perform the most damaging pillage, the pillage strength of army has to be at minimum 20% of the attacked province’s population.
If there is a defending field army, it has to be destroyed so that the Pillage could be performed.
The defending army is allowed to retreat if the option is turned on and if it’s deployed in a military post.
The Fortress preserves a certain number of the civil population from enemy pillage attack. In case the Fortress is ruined, Sanctuaries preserve 1/3 of the basic amount of population.
Battle Mechanics
Army movement
Army’s always travelling with the speed of the slowest unit, for example siege engines – 40 IM/h. While on a mission, it requires 1,2 times bigger upkeep than while being in the empire.
Different mission types’ travelling times:
10 minutes are added to the actual time for travelling on the global map (to an empire/barbarian camp on the global map), and 2.5 minutes to a barbarian camp/independent city in an exclusive zone or independent city outside the zone, or to an abandoned empire). This applies to the following military missions: attacking, annexing, turning into vassal, looting an independent city, field battle against a barbarian camp, attacking alliance holdings, reinforcements.
- Military mission to another active empire - 10 minutes are added to the actual time for travelling on the global map. For example, if the army travels to the empire in 6 minutes, with the addition of the 10-minute time, the mission will arrive in 16 minutes. Duration in both directions is equal. If the traveling duration is less than 60 minutes, the defender will see the attack coming right after it’s been sent. If it lasts more than an hour (whether it’s 1 hr. 5 min. or 5 hrs), the defender will see it coming 60 minutes before it hits. The instant travel option is not available.
- A military mission for looting resources in independent city - 2.5 minutes are added to the actual time for travelling on the global map. For example, if the army travels to the independent city in 30 seconds, with the addition of the 2.5-minute time, the mission will arrive in 3 minutes. The mission can be concluded instantly for the price of 170 diamonds, only in case the object is in the exclusive zone.
- A military mission for turning a independent city into vassal - 2.5 minutes are added to the actual time for travelling on the global map. For example, if the army travels to the independent city in 30 seconds, with the addition of the 2.5-minute time, the mission will arrive in 3 minutes. The mission can be concluded instantly for the price of 170 diamonds, in case the object is in an exclusive zone or it shares border with a province.
- A military mission for annexing a independent city - 2.5 minutes are added to the actual time for travelling on the global map. For example, if the army travels to the independent city in 30 seconds, with the addition of the 2.5-minute time, the mission will arrive in 3 minutes. The mission can be concluded instantly for the price of 170 diamonds, in case the object is in an exclusive zone or it shares border with a province.
- A military mission for annexing a vassal - 2.5 minutes are added to the actual time for travelling on the global map. For example, if the army travels to the vassal in 30 seconds, with the addition of the 2.5-minute time, the mission will arrive in 3 minutes. The mission can be concluded instantly for the price of 170 diamonds, in case the object is in an exclusive zone or it shares border with a province.
- A mission for annexing a terrain - independent free terrain can be annexed only peacefully. The minimum duration is 2.5 minutes and can be concluded instantly for the price of 170 diamonds, no matter of the terrain’s location on the Global map.
- A mission for foundation of a remote holding (colony, trading post or military post) - the minimum duration is 2.5 minutes and it can be concluded instantly for the price of 510 diamonds for each hour of travelling. The price for each additional hour is added right after it begins passing - if the mission lasts 1 hr and 10 min., concluding the mission instantly will cost 1020 diamonds.
- A military mission for looting a Barbarian Camp - If the barbarian camp is outside the exclusive zone, 10 minutes are added to the actual time for travelling on the global map. For example, if the army travels to the barbarian camp in 6 minutes, with the addition of the 10-minute time, the mission will arrive in 16 minutes. If the barbarian camp is within the exclusive zone, 2.5 minutes are added to the actual time for travelling on the global map. For example, if the army travels to the barbarian camp in 30 seconds, with the addition of the 2.5-minute time, the mission will arrive in 3 minutes. The instant travel option is not available.
- Relocation army between provinces - it lasts 0.66666666666667 minutes, instant travel is available.
- Army relocation between remote holdings (colony, trading post or military post) - the minimum duration is 0.66666666666667 minutes, instant travel isn’t available.
- Transport mission between all holdings - the minimum duration is 0.66666666666667 minutes, free instant travel option is available.
- A military mission to an abandoned empire - 2.5 minutes are added to the actual time for travelling on the global map. For example, if the army travels to the abandoned empire in 30 seconds, with the addition of the 2.5-minute time, the mission will arrive in 3 minutes. Instant travel isn’t available.
- Sending reinforcements to an ally – 10 minutes are added to the actual time for travelling on the global map. For example, if the reinforcement army travels to the ally’s empire in 6 minutes, with the addition of the 10-minute time, the mission will arrive in 16 minutes.
- Army donation - minimal travel time is 0.66666666666667 minutes. If the target would be reached for less than 0.66666666666667 minutes, the army will travel 0.66666666666667 minutes. The instant travel option is not available.
- Military mission of the alliance - 10 minutes are added to the actual time for travelling on the global map. For example, if the army travels to the enemy rally point or castle in 6 minutes, with the addition of the 10-minute time, the mission will arrive in 16 minutes. The defender will see the attack right after it’s been sent. The instant travel option is not available.
NB: If the page is not being refreshed regularly, mission’s remaining time displayed by the timers might not correspond to the right server time which all in-game actions and events are in line with. Therefore, if you consider the right time as crucial for the impeccable success of your missions, we recommend that you refresh the page regularly mostly when there is more than one moving army (either relocated or attacking or both) and when there are less than 2 minutes left to impact. Either way, bear in mind that a 1 to 2 second diversion from the estimated time, especially when the interference of the battle calculator is involved, is possible to occur, so the success in catching someone’s army in an 1 to 2 second interval is hardly guaranteed.
Cartography may decrease mission’s time, but no mission could last for less than 0.66666666666667 minutes. Travelling time on the Global map is calculated with the following formula: ((distance/speed) / (1 + ((Cartography level + Alliance Cartography level) / 10))) x 60 = time from А to B in minutes for slow realm with speed х1 (for speed х2 the result is divided by 2, for speed х4 - /4, for speed х10 - /10), where speed is the speed of the slowest unit.
The defender cannot relocate army to and from the province under attack if there are less than 5 seconds left to the impact.
The attacker cannot recall the army when there are less then 5 seconds left to the impact.
Field Battle
Army deployment on the battle field – it is divided into three basic zones: Left Flank, Center, Right Flank, distributed in depth in Front and Back line, given that one more line is located between them.
- Front line – disposes of 3 zones: Left Flank, Center and Right Flank. It is where melee units are deployed.
- Second line - Reserve – consists of only one zone where, again, melee units, common for all zones in front, are deployed. It serves for filling in the front zones in case of flank or center defeated units. If two zones are broke at the same time by the enemy’s army, so, randomly, one of them is filled in with reserve units.
- Third line – Archers – it has 3 zones: Left Flank, Center and Right Flank, where only Archers are deployed. They fire at the enemy front line zone, according to a mirror principal, i.e. if the Archers are at the center, they fire at the enemy center, but if they’re at the Left Flank, they fire at the enemy’s Right Flank. If in front of the Archers there isn’t any army, they change their zone, randomly. If no melee units are left in front of the Archers, they fight with 1/4 of their normal attack. Archers have a limited number of arrows (18 shots). After that they stop attacking and get involved again only if the battle comes to them and they enter a melee battle.
- Fourth line – Siege Engines – only one zone, where sige engines are deployed. They fire at the enemy’s units simultaneously and their damage is divided equally between each and every line and its respective zones.
Field Battle Process
The main purpose is destroying the enemy’s army in at least one zone, so that your army could fight with flanking bonus 20% against the rest of the enemy units. If the army of some Front line’s zone destroys the opposite army, the enemy’s Reserves change place and cut off the advancing units. If the army manages to defeat the Reserves, it continues towards the Third line Archers. If it overcomes them too, it starts attacking with bonus attack 20% in the other two zones. After having destroyed the entire enemy army, the victorious troops head towards the Fourth line siege engines, given that here the principle of morale drop is not applied, i.e. – the winning army can’t flee while fighting only against siege engines.
Fortress Siege
Attacking army deployment
- Front line – consists of 1 zone, where all melee units plus the Battering rams are deployed.
- Second line – 1 zone – Archers only.
- Third line – 1 zone – All siege engines except Battering Rams.
Attack process
Units are divided into 3 groups: those who inflict damage to the Fortress walls, those who fire at the garrisoned units and, finally, units which don’t participate in the fight before Fortress wall’s destruction.
All siege engines shoot at the wall and do not inflict damage to the garrisoned units.
The Battering Rams advance and attack along with the Infantry.
The Cavalry cannot attack the wall. It joins the battle after Fortress wall’s destruction.
Swordsmen and Spearmen are the only units, except the siege engines, inflicting damage to the Fortress wall. The number of allowed units in a Fortress siege is 3 times(5 times against alliance holdings) the Fortress garrison (the basic one, Military Architecture is not accounted), selecting always the swordsmen first and then the spearmen and always starting from the heaviest unit in regression. The rest of the army in first line wait in reserve to complete the places of killed attacking soldiers.
Battering Rams are limited by the same principal, but their quota is calculated separately, i.e. they don’t occupy Infantry’s places, but their allowed number is equal to the Infantry number divided by the number of people required for Battering Ram recruitment.
Before each round the group attacking the wall (battering rams, swordsmen and javelin men) is formed. Then, immediately advances. Before reaching the wall, it’s being fired by the defending Archers and those, who have managed to survive, inflict damage to the wall.
In the next round, defeated units’ places are filled in and subjected to Archers’ fire, before being able to hit the wall, which means that if the Archers manage to kill the entire group, no damages will be inflicted to the Fortress wall, regardless there are Reserves waiting to join the battle.
Battering Rams suffer damage as the Infantry does. The damages are divided equally between them, calculating the number of people required for the recruitment of one Battering Ram.
The number of siege engines (without Battering rams), firing the wall, depends on Fortress’ level. Even if you send more siege machines, only the number allowed by the Fortress level will fire. The higher the Fortress level is, the more siege machines can fire at the wall. The number of siege machines that can attack one Fortress level, is 4. Siege machines can be of one type or of different types. If you send more machines than the number allowed by the Fortress level, the ones with the biggest attack strength will charge. If they get destroyed in the battle, the next ones with biggest attack strength will take their places. Trebuchets are the strongest - 4800, then Catapults - 2400, and the weakest are Ballistae - 2000. Thus, their order of appearance in the siege is as follows: 1. Trebuchets, 2. Catapults, 3. Ballistae. The limit of the number of siege machines does not refer to Battering rams.
Example: If you send 200 soldiers, 5 Trebuchets, 1 Catapult and 1 Ballista to attack a Fortress level 1, the 4 Trebuchets, which have the bigger attack strength, will charge first. If one of them gets destroyed, the 5th Trebuchet will take its place, so there will be again 4 Trebuchets. If you lose another Trebuchet, a Catapult will take its place, for it has bigger attack strength than the Ballista. Then, if either a Trebuchet or a Catapult get damaged, a Ballista will take their place.
| Fortress Level | Long ranged siege machines in attack |
|---|---|
| 1 | 4 |
| 2 | 8 |
| 3 | 15 |
| 4 | 30 |
| 5 | 60 |
| 6 | 125 |
| 7 | 250 |
| 8 | 500 |
| 9 | 1 000 |
| Alliance Fortress Level | Long ranged siege machines in attack |
|---|---|
| 1 | 80 |
| 2 | 160 |
| 3 | 300 |
| 4 | 600 |
| 5 | 1 200 |
| 6 | 2 500 |
| 7 | 5 000 |
| 8 | 10 000 |
| 9 | 20 000 |
| 10 | 40 000 |
Attacking Archers fire at the defending Front line, but the damages are divided into 5. They start shooting at the first line of units, after they destroy them, they move to second line (siege weapons).
When the wall is smashed, all Front line units join the battle and attack the garrison, without any number limits. Cavalry fights too, but with reduced parameters, as it doesn’t use its usual bonuses like charge in a field battle.
Defending army deployment
Moat - decreases the attacking army’s (infantry and siege machines) hit points with 2% per level. After level 4 of Fortress, 10 levels of Moat can be built. When another Fortress level get built, the existing levels of Moat vanish and the player is let to build another 10 levels of it. When a higher level of Fortress starts to build, the player receives back 50% of the resources invested in Moat and loses the net points gained from building it.
Fortress wall – Its solidity is equal to the number of hit points the respective Fortress level has plus the terrain and research bonuses. As long as it is intact, the garrison is quite completely free of damage.
Curtain wall - increases hit points of the Fortress with 5% per level. After level 4 of Fortress, 10 levels of Curtain wall can be built. When another Fortress level get built, the existing levels of Curtain wall vanish and the player is let to build another 10 levels of it. When a higher level of Fortress starts to build, the player receives back 50% of the resources invested in Curtain wall and loses the net points gained from building it. The price of the Curtain wall is equal to 5% of the basic price of the current Fortress level. When the Fortress is destroyed, the Curtain wall remains intact.
Towers - they act like static ballistae and participate in the attack of the defender. A tower’s attack strength is equal to a ballista’s attack strength - 3000. Towers don’t have hit points. If the fortress gets damaged, the towers get destroyed as well, but they can be repaired along with the fortress. Their primary target is the attacker’s front line which is advancing towards the fortress wall. If this line is destroyed, then the towers switch their attack on the third line of the attacker where his siege machines are deployed. In case this line is destroyed as well, the towers switch to their final target - the second line of the attacking army where archers are deployed.
Front line – 1 zone, where all units except the siege engines are deployed, but only the Archers inflict damage to the attacker before the wall’s destruction. When the wall is smashed, all units get involved in the battle.
Second line – 1 zone, where all siege engines are gathered. Catapults and Trebuchets cause damage to the attacking army exactly as they do it in a field battle. They aren’t vulnerable in that kind of situation because the attacking siege engines (the only anti-unit of another siege engines) are occupied firing at the Fortress walls.
Defense process
Garrisoned Archers fight with their attack x4, entirely directed to the attacking enemy troops (all units except the Battering rams which are fired by the normal Archer attack, and the Swordsmen - fired by the Archer attack x2), aiming to prevent the wall getting down. If the attacking army’s groups don’t dispose of swordsmen and spearmen, Archers start firing at enemy’s archers and cavalry. The damages are divided proportionally according to the number of target enemy units.
Garrisoned Ballistae fire at the attacking Third line siege engines (catapults, trebuchets and ballistae), if there aren’t any or they have been destroyed, ballistae’s attack is proportionally distributed between all enemy lines.
Defender’s Cavalry doesn’t have any bonuses.
Battle Formations
The Battle Formations show the way army is deployed on the battle field, i.e. military units’ distribution percentage through the battle zones: center, left Flank, right Flank and Reserve. The formation in defense is set in the Deployment tab of the Fortress below province’s units. The formation in attack is set separately for each attack in the Attack tab of the Fortress below the units. Players dispose of 6 Formation types, with which they can manage and control by themselves the soldiers’ military achievements and their own commanding abilities.
Balanced Formation
- Frontline – 15% of the Frontline army in each Flank, 60% in the Center and 10% in the Reserve.
- Third line – Archers – 20% of the Archer in each Flank and 60% in the Center.
Strong Center
- Frontline – 10% of the Frontline army in each Flank, 70% in the Center and 10% in the Reserve.
- Third line – Archers – 10% of the Archer in each Flank and 80% in the Center.
Strong Flanks
- Frontline – 20% of the Frontline army in each Flank, 50% in the Center and 10% in the Reserve.
- Third line – Archers – 25% of the Archer in each Flank and 50% in the Center.
Strong Center with Flanking Archers
- Frontline – 10% of the Frontline army in each Flank, 70% in the Center and 10% in the Reserve.
- Third line – Archers – 40% of the Archer in each Flank and 20% in the Center.
Strong Center with Balanced Archers
- Frontline – 10% of the Frontline army in each Flank, 70% in the Center and 10% in the Reserve.
- Third line – Archers – 30% of the Archer in each Flank and 40% in the Center.
Strong Flanks with Flanking Archers
- Frontline – 20% of the Frontline army in each Flank, 50% in the Center and 10% in the Reserve.
- Third line – Archers – 40% of the Archer in each Flank and 20% in the Center.
NB: Without Tactics level, all players are fighting with the Balanced Formation, exclusively. Then, each level opens the access to one Battle Formation.
Fortress
Fortress Classes
- Light Class – 1st, 2nd and 3rd Fortress level – defends the province from the Light Unit Class.
- Heavy Class – 4th, 5th and 6th Fortress level - defends the province from the Heavy Unit Class.
- Elite Class – 7th, 8th, 9th and 10th Fortress level - defends the province from the Elite and Heroic Unit Class.
Fortress Repair
When a Fortress is taken it is considered destroyed. The repair is instant and the price is equal to the price of the previous level, estimated in stone. The price of the repair of level one is equal to 25% of the price of its building in stone. Example: The price of level 2 of Fortress costs 600 wood and 4000 stone. When level 2 is destroyed, the player will pay for its repairing 1150 stone, because the basic price of level 1 is 1000 stone and 150 wood. While the fortress is destroyed, the holding makes use of the previous level’s bonus for resource production.
Fortress Characteristics
| Level | Price (GE) | Stone | Wood | Hit points | Garrison | Max. number long ranged siege machines | Resources capacity | Towers | Moat (1x1) | Preserved population | Preserved resources (from each type) | Curtain Wall (1х1) | Happiness | Increases the production |
|---|---|---|---|---|---|---|---|---|---|---|---|---|---|---|
| 1 | 1 150 | 1 000 | 150 | 34 320 | 55 | 4 | 20 000 | - | 10 | 1000 | 350 | 1 | 1 | 4 |
| 2 | 4 600 | 4 000 | 600 | 68 640 | 110 | 8 | 35 000 | - | 10 | 1200 | 1000 | 1 | 2 | 6 |
| 3 | 18 400 | 16 000 | 2 400 | 137 280 | 220 | 15 | 110 000 | 1 | 10 | 1500 | 3500 | 1 | 3 | 10 |
| 4 | 73 600 | 64 000 | 9 600 | 411 840 | 440 | 30 | 410 000 | 2 | 10 | 2500 | 12000 | 1 | 4 | 4 |
| 5 | 294 400 | 256 000 | 38 400 | 823 680 | 880 | 60 | 1 210 000 | 4 | 10 | 5000 | 35000 | 1 | 5 | 6 |
| 6 | 1 177 600 | 1 024 000 | 153 600 | 1 647 360 | 1 760 | 125 | 4 810 000 | 6 | 10 | 9000 | 135000 | 1 | 6 | 10 |
| 7 | 4 710 400 | 4 096 000 | 614 400 | 6 589 440 | 3 520 | 250 | 19 210 000 | 12 | 10 | 16000 | 550000 | 1 | 7 | 4 |
| 8 | 18 841 600 | 16 384 000 | 2 457 600 | 13 178 880 | 7 040 | 500 | 38 410 000 | 18 | 10 | 27000 | 1100000 | 1 | 8 | 6 |
| 9 | 75 366 400 | 65 536 000 | 9 830 400 | 26 357 760 | 14 080 | 1 000 | 76 820 000 | 24 | 10 | 45000 | 2000000 | 2 | 10 | 10 |
| 10 | 364 773 376 | 317 194 240 | 47 579 136 | 52 715 520 | 28 160 | 2 000 | 0 | 24 | 10 | 90 000 | 3 000 000 | 2 | 11 | 4 |
Fortress defensive facilities
Preserved resources - automatically stashes and hides the resource amount its level capacity allows, while the province is under attack. Preserves equal amount of each resource.
Towers - they act like static ballistae and participate in the attack of the defender. A tower’s attack strength is equal to a ballista’s attack strength - 3000. Towers don’t have hit points. If the fortress gets damaged, the towers get destroyed as well, but they can be repaired along with the fortress.
Moat - decreases the attacking army’s hit points with 2% per level.
Curtain wall - increases Fortress’s hit points with 5% per level.
Preserved population - every following level of the Fortress increases the number of preserved population.
Recovery after the Battle
Lost units after each battle with personal armies are sent to a tab in the Command Center, called Infirmary. Once there, they can be recovered within 84 hours for realms with speed x4 and 34 hours in realms with speed x10 after the battle, otherwise they will disappear.
• Free recovery is limited to 65% of lost units per battle - 15% base for attackers/15% base for defenders and each level of Military medicine increases it by 0,5% for attackers/1% for defenders;
• You are also able to recover 35% of the lost units per battle with diamonds no matter the level of your Military Medicine;
• The recovery occurs in the Capital and is not possible when the player is under a locking attack, regardless of which holding the locking attack is sent to. When an army was engaged in an attack the recovery will be possible after its return home;
• Units are visible in one place depending on their type and class;
• There is a timer which counts the time remaining for recovery, and after it expires, the amount of units will disappear;
• The alliance army does not recover in the Infirmary. It is automatically recovered after each battle, according to the rates and logic for attacker/defender. The maximum amount of alliance army that can be recovered is 50%.
Dungeon
After each field battle, fortress siege and pillage there is a chance for the General of the losing side to be captured by the opponent. The exact chance depends on multiple factors, including the scale of the encounter, both generals’ experience and the closeness of the losses. The higher the experience, the bigger the chance for a general to be captured.
• Once a General is captured, he is held captive for a set amount of time depending on their rarity. A captured general becomes inactive and cannot be used by the player - his slot in the family tree is locked and he is removed from any occupied Governor/General slots. If an emperor is captured, his governor bonuses are nullified but his slot remains filled. Captured enemy Generals can be seen in the "Dungeon" tab, inside the Palace.
• Freeing your captured General can be done by paying a bounty in Diamonds - this amount also depends on the person’s rarity. 30% of the paid sum is transferred to the capturer, and the general is immediately returned to his original ruler. A general who hasn’t been redeemed before the time limit, dies automatically. Aging rate is not affected during captivity.
Battle and Upkeep
Fortress garrisons do not require upkeep.
If gold is not enough, and your troops are on a march, they continue the mission, generating negative gold balance in your Treasury.
The army cannot start its mission unless the gold in the Treasury is positive.
Military points - in peaceful times they can be earned in two ways:
- Destroying enemy Fortresses:
Fortress Level Military Points 1 1 2 2 3 3 4 4 5 5 6 16 7 32 8 64 9 128
Destroying enemy units – a killed army worth 5000 gold equivalent is equal to 1 military point. Attacking destroyed fortress and an independent city does not bring the attacker any military points.
Military ranks - the amount of a player’s military points determines their military rank, visible in the official ranking, as follows:
- From 0 to 149 - Rookie
- From 150 to 249 - Private
- From 250 to 499 - Corporal
- From 500 to 749 - Second Sergeant
- From 750 to 1499 - Sergeant
- From 1500 to 2999 - Senior Sergeant
- From 3000 to 7499 - Officer Candidate
- From 7500 to 14999 - Second Lieutenant
- From 15000 to 22499 - Lieutenant
- From 22500 to 34999 – Senior Lieutenant
- From 35000 to 49999 - Captain
- From 50000 to 74999 - Major
- From 75000 to 99999 - Lieutenant-Colonel
- From 100000 to 149999 - Colonel
- From 150000 to 224999 - Brigadier General
- From 225000 to 324999 - Major General
- From 325000 to 499999 - Lieutenant General
- From 500000 to 749999 - General
- From 750000 to + ∞ - Marshal
Warrior of the Day Medal - It’s awarded for exceptional military performance in each day. Each player is evaluated by his battles against other active players. Won military points, pillaged population, point difference between participating sides and amount of losses are all taken into account. Mind that this award requires a set minimum of unique battles in the realm or it won’t be given away. The player with most awards Warrior of the Day during the season will receive a medal at its end.
Espionage and scouting
Espionage
When the Espionage screen is displayed all the player’s provinces are shown. The ones colored in red are boxed provinces (surrounded everywhere by other provinces), and therefore the attacking army fights with -20 morale.
Spies’ speed is 3600 IM/h.
The chance to perform a successful mission depends on the level of the Espionage and the number of sent spies.
Spies’ upkeep on a mission is equal to the normal upkeep x1.2
In Espionage screen you can either infiltrate spies, or check out your own or your allies’ last espionage report. It presents the condition of the province/colony from the very moment it was spied, therefore the last espionage report doesn’t provide an updated information.
Counter-espionage
Serves for searching and destroying enemy spies.
Capturing a spy at the border is automatic.
Every infiltrated spy can be captured unless he hasn’t been called back.
By clicking on the Counter-Espionage button, you can see all infiltrated spies.
You will see the chance you have for capturing enemy spies in Counter-Espionage menu. This chance is based on the espionage formula which takes into account the number of spies on both sides as well as the levels of Espionage of the attacker and Counter-Espionage of the defender.
You won’t see enemy spies in a holding unless you have spies of your own deployed there.
You will not see the name of the sender of the spies if you have less than 5% chance to capture them.
If you have been infiltrated there will be a chance to receive a message notifying you of the presence of enemy spies. The chance once again depends on the espionage formula which takes into account the number of spies on both sides as well as the levels of Espionage of the attacker and Counter-Espionage of the defender.
Instant use of Counter-Espionage increases, artificially and single time, the defender’s Counter-Espionage Research by three levels.
Factors influencing the successful Espionage and Counter-Espionage:
The chance for successful infiltration is determined by comparing the levels of espionage and counter-espionage and the number of sent and defensive spies of the spying and spied player, respectively.
The espionage works with a formula which gives equal chances for success when the technologies’ levels and number of spies are equal.
With every following sent spy, the chance for success increases, as the spies’ number of the spying player is compared to the number of recruited and mobilized spied player’s spies, as well as Espionage and Counter-Espionage levels are compared, so the successful espionage is in direct dependence on the numerical superiority.
If the spying player manages to infiltrate, he receives an espionage report consisting of: the number and type of enemy’s army (field and garrison), the amount of gathered resources in the province, the Treasury’s capital (if the spied territory is the capital) and the Fortress level.
If by clicking on the Infiltration button the spying player is captured, he loses 20% of the sent spies, he doesn’t receive an espionage report, and the spied one sees whose the attempt for infiltration is.
If the spying player manages to infiltrate, but the spied one activates his Counter-Espionage, by clicking on the respective button, the chance calculation is performed once again - the espionage levels and the number of sent spies and the mobilized ones are compared again and, if the spying player has the necessary numerical and espionage superiority, the spied one loses 20% of his mobilized spies, while the aggressor receives successfully an espionage report. In case the numerical and espionage superiority turns out to belong to the spied player, the enemy spies are chased out without spy losses for both sides.
Espionage simulator
It allows you to fill your opponent’s and your own levels of Espionage/Counter-espionage and number of spies in the fields in order to calculate the chances for successful espionage/counter-espionage and/or the number of possibly lost spies.
Since the espionage/counter-espionage works with a formula which gives equal chances for successful espionage when the technologies’ levels and number of spies are equal, bear in mind that the result you receive from the Espionage simulator might not correspond to result of your espionage/counter-espionage mission.
Scouting
A research which lets the player spy out territories around the capital and look for terrains with special resource, enemy colonies, military and trading posts, as well as rally points. The scouting missions are conducted by the spies in menu Espionage >> Scouting. Each level increases the perimeter of scouting with 5 points, the highest level is 20. One spy performs a scouting mission at a range of 3,14 points for one hour. The time needed for N number of spies to perform scouting in a range of X points is estimated as follows: (X^2 / N).
Example 1: A player’s got level 2 of the research Scouting, this means he can perform scouting missions at a range of 10 Points (a Point is a measurement unit for distance on the global map). The player sends out 20 spies on a scouting mission. Time required for completing the mission is estimated as follows: (X^2 / N): 10^2 / 20) = 100 / 20 = 5 hours. Hence, time required for performing a scouting mission and getting a scouting report is 5 hours. If the result by this formula is less than 1, we consider that time for the scouting mission is 1 hour. Example 2: A player’s got level 2 of the research Scouting, this means he can perform scouting missions at a range of 10 Points. The player sends out 200 spies on a scouting mission. Time required for completing the mission is estimated as follows: (X^2 / N): 10^2 / 200) = 100 / 200 = 0,5 hours. Hence, time required for performing a scouting mission and getting a scouting report is 1 hour.
NB: The duration and speed of scouting are not affected by the speed of the realm.
Espionage, Counter-Espionage and Attack
If attacker’s Espionage and defender’s Counter-espionage levels are equal, the defender sees the attacking army’s composition 1.5 minutes before the impact. For each level difference 0.5 minutes are added or extracted, respectively. The bonus from Secret agent skill does not take effect.
Espionage and Alliance
When part of an alliance a player gets the additional bonus to use his/hers allies spy reports. The most current spy reports done by the player or his/hers allies is always visible in the player’s private list. These reports don’t provide current information but the information that was found at the time of the spying.
Honor
This is the statistic that shows each player’s military behavior, according to the fact whether they conduct equal battles, fights in a rather civilized way etc.
Actions generating negative Honor:
- Attacking an enemy out of the allowed net worth points range x2 – causes Honor loss of 2 points per every 0.1 coefficient difference.
- For recalling the army after the 15th minute after it has been sent on a mission – 1 Honor point.
- For Pillaging an enemy’s province - 4 Honor points.
- For declaring war without previously changing the Alliance standing from Neutral to Hostile – 4 Honor points drop for each member of the Aggressor. (Only for Alliance members)
NB! Honor penalty for pillaging is taken after the battle is realized and, thus, it is shown in the battle report. Honor penalty for attacking out of range, though, is taken right after the attack has been sent, so it is never shown in the battle report and Honor is always subtracted even if the attack is recalled.
Actions generating positive Honor:
- All players receive +8 daily Honor points for realms with speed x4 and +20 daily Honor points for realms with speed x10 and Diplomacy Officers +4 additional Honor points for realms with speed x4 and +10 additional Honor points for realms with speed x10 every day in second and third loyalty status.
- Winning a field battle - 1 point, however, only in case the winning army has lost at least 10% of its units.
- Winning a Fortress Siege battle regardless on which side (defender or attacker) - 2 points, however, only in case the winning army has lost, at least, 10% of its units.
-
The amount of honor, which the winner gains from killed enemy army depends on the value of the killed soldiers’ gold worth and it is estimated as follows: (Gold equivalent of killed soldiers / (winner’s net points x1000)) x100 x 10 = Honor. If the result is a fractional number, it is rounded down.
NB: The attack must not be out of the allowed range x2 and must still meet the requirement for Honor - having lost at least 10% of your own units.
Example: A player has 100 000 net points. The player attacks another player and kills 1000 heavy swordsmen. After the battle we need to estimate 1000 heavy swordsmen’s gold equivalent. One swordsman’s gold equivalent is 544. So 1000 swordsmen make 1000 * 544 = 544 000 gold equivalent. Then we use that gold equivalent in the formula of the Honor:
(544 000 / (100 000 x 1000)) x 100 x 10 = 0,00544 x 100 x 10 = 5,44
Honor’s value is 5.
Attacking out of the allowed net worth points range x2 causes Honor, Morale and Attack losses per every difference of 0,1 coefficient, as it follows:
2 Honor points
1,67 Morale points
3% of the attacker’s unit parameter ’attack’, which is valid only when the attacker is the bigger account.
* Important: A successful attack battle, out of range x2, does not bring the attacker with bigger amount of net points any military points, honor or medal. If the attacker has less net points than the defender and wins the battle out of range x2, he/she will gain military points, honor or medal. During a war this rule remains valid, however military points, gained by the attacking player with bigger amount of net points, count for the alliance. Attacks upon Empires out of range x2 will not cause attack strength drop, if the attacker has less net points than the defender, but the morale and honor punishments will still apply.
* The net worth points range is once calculated when the attack is sent and again at the time of the impact. - The highest number of Honor points a player can win is 500, the minimum is minus 500. Each point exceeding these limits will not count.
- Aggressors - others, who had attacked the player or other players he/she is married to. First attack on an aggressor does not apply punishment on Honor. Keep in mind that the punishment with 4 Honor points for Pillage attack always applies.
Honor, Morale and Happiness
Positive honor:
It gives the player bonus to his basic Morale. For each 25 Honor points they get 1 Morale point. The highest amount of Morale points a player can gain as a bonus for positive Honor, is 20.
For each 100 Honor, the player get 1 Happiness point. The highest amount of Happiness he can gain as a bonus for positive Honor, is 5.
Negative honor:
When Honor points get below -100, 5 points Happiness are taken away daily as punishment.
For each -10 Honor, the player lose 1 Moral point. The highest amount of Morale points a player can lose for negative Honor is 50.
Capitulation
Allows a certain Empire to defend itself from the attacks of another one for 16.8 hours. During this period, neither the capitulated Empire nor the attacking one can send attacks to each other. Capitulation is possible only if you haven’t attacked the player you intend to capitulate to in the passed 4.8 hours and if the player you intend to capitulate to has attacked you in the passed 4.8 hours. All players you can currently capitulate to are listed in Others tab of the Command center in the fortress. You can capitulate up to 10 times in a period of 16.8 hours, having met the above mentioned requirements. If you capitulate to a player, who had sent an attack to you and the attack is approaching your empire, it will hit. First capitulation is free of charge, the second is 1700 diamonds and each following capitulation is 1700 diamonds more expensive. Each capitulation decreases your military points with 10% and your battle rating with 10%. In a war, capitulations of members of hostile alliances lose their validity.